Keeping Your Roof Sturdy: A Comprehensive Guide to Repair Damaged Roofing Plywood with Top Roofing Contractors in Jacksonville, FL
Contents
- 1 Keeping Your Roof Sturdy: A Comprehensive Guide to Repair Damaged Roofing Plywood with Top Roofing Contractors in Jacksonville, FL
- 1.1 A. The Crucial Role of a Skilled Jacksonville Roofing Contractor in Maintaining a Sturdy Roof and Providing Effective Roof Repair Services :
- 1.2 B. A Comprehensive Guide to Repairing Damaged Roofing Plywood: Insights from Jacksonville’s Top Roofing Contractor:
- 1.3 C. A Concise Guide to the Step-by-Step Process of Roof Repair and Replacement by Top Jacksonville Roofing Contractors:
- 1.4 Efficiently Preparing the Work Area: Expert Roofing Contractor Services in Jacksonville, FL:
- 1.5 A. Removing felt underlayment during roof repair in Jacksonville, FL:
- 1.6 B. Expert Tips for Effortlessly Removing Metal or Plastic Caps: Techniques and Advice from Jacksonville Roofing Contractors:
- 1.7 C. The Significance of Checking the Weather Forecast Prior to Initiating the Project for Roof Repair in Jacksonville, FL:
- 1.8 Finding the Best Roofing Contractor in Jacksonville for Roof Repair and Stud Marking Services:
- 1.9 A. Efficiently Marking Y Studs: The Role of a Jacksonville Roofing Contractor and the Use of a Chalk Line:
- 1.10 B. Optimizing Framing Nails for Accurate Stud Location: A Guide for Contractors and Roofers in Jacksonville, Florida:
- 1.11 C. Improving Accuracy: Utilizing X Lines for Precise Measurements on Upper and Lower Surfaces:
- 1.12 Expert Roofing Contractor in Jacksonville: Cutting the Plywood for Roof Repair Services:
- 1.13 A. Achieving Accurate Cuts on Marked Lines with the Assistance of a Skilled Roofer and Quality Roofing Service in Jacksonville, Florida:
- 1.14 B. Maintaining Stability: Ensuring a Centered Cut on the Stud with Expert Roofing Services:
- 1.15 C. Optimizing Saw Calibration to Safeguard Studs and Prevent Damage during Roofing Projects:
- 1.16 Expert Roofing Contractors in Jacksonville for Efficient Plywood Removal and Repair Services:
- 1.17 A. Efficiently Removing Top Area Framing Nails with a Claw Bar: A Guide for Jacksonville Roofers:
- 1.18 B. Examining Roofing Studs for Strength and Stability: A Focus on Jacksonville Roofing Services:
- 1.19 C. Stud Cleaning: Removing Lifted Nails and Wood Chips for Jacksonville Roofers:
- 1.20 Expert Roofing Contractor in Jacksonville: Precision and Technique for Positioning and Cutting the New Plywood:
- 1.21 A. The strategic placement of the recently acquired plywood within the designated workspace: A comprehensive guide for roofers, roofing services, and commercial roofing in Jacksonville, Florida:
- 1.22 B. Ensuring Adequate Modifications for Pipes or Vents: A Comprehensive Approach to Roofer Services, Jacksonville Roofing, Roofing in Jacksonville, FL Roofing Contractor, Roof Replacement, and More:
- 1.23 C. Enhancing the Installation of a Snug-Fitting Roof in Jacksonville by Incorporating a Subtle Overhang at the Perimeters:
- 1.24 Nailing Down the Plywood: Unveiling the Top Roofing Contractors in Jacksonville for the Best Roofing Services:
- 1.25 A. Securing Plywood to Studs on Jacksonville Roofs: A Guide to Using Framing Nails:
- 1.26 B. Ensuring Stability: Recommended Nail Spacing for Roofing Companies and Residential Roof Repair or Replacement:
- 1.27 C. Securing Proper Nailing of New and Existing Plywood for Roof Stability: A Guide to FL Roofing Companies and Residential Roof Repair:
- 1.28 Preventing Common Roof Leak Issues: Expert Tips from Jacksonville’s Best Roofing Contractors:
- 1.29 A. Common Roof Leak Issues with Exposed Flashing: A Comprehensive Explanation for Jacksonville Residents and Homeowners:
- 1.30 B. The Advantages of Using Screws with Rubber Gaskets for Roof Repairs in the FL Roofing Industry:
- 1.31 C. The advantages of screws for a more durable roof in Jacksonville, Florida: Insights from roofing companies and experts in residential roofing and repairs:
- 1.32 A. Recap of the step-by-step process for repairing damaged roofing plywood:
- 1.33 B. Reiterating the importance of maintaining a healthy and sturdy roof:
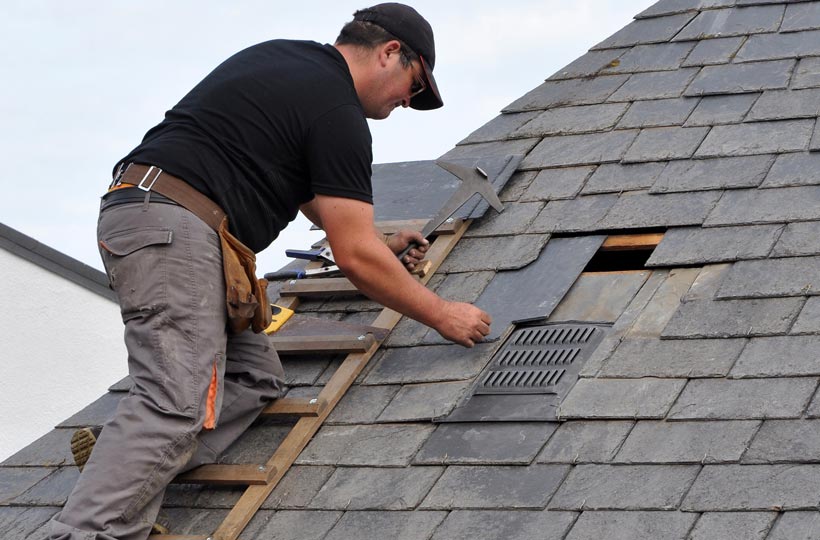
In the Jacksonville area, ensuring the safety and comfort of your home or building starts with a sturdy roof. It acts as the first line of defense against the elements. However, as time passes, roofs can experience wear and tear, resulting in a range of issues, such as damaged roofing plywood. Florida Roofing Pros, a trusted roofing company specializing in roof installation and inspection for both residential and commercial properties, is here to guide you through the process of repairing damaged roofing plywood.
With their expertise in new roof installations and roof inspections, Florida Roofing Pros is well-equipped to handle any roofing project. Whether you’re in need of a metal roof replacement or simply want a free roof inspection to assess the condition of your current roof, their team is dedicated to providing top-notch service. From residential homes to commercial buildings, they have the knowledge and experience to address all your roofing needs in the Jacksonville area.
Don’t let a damaged roof compromise the safety and comfort of your property – trust Florida Roofing Pros for all your roofing repair and installation needs.
A. The Crucial Role of a Skilled Jacksonville Roofing Contractor in Maintaining a Sturdy Roof and Providing Effective Roof Repair Services :
Your roof plays a crucial role in safeguarding your home against the harsh Florida climate, including heavy rain, strong winds, and intense sunlight. A sturdy roof not only provides protection but also helps maintain the structural integrity of your property. It prevents water leaks, which can lead to mold growth, rotting wood, and even structural damage. By ensuring your roof is in good condition, you can avoid costly repairs and maintain the value of your home.
B. A Comprehensive Guide to Repairing Damaged Roofing Plywood: Insights from Jacksonville’s Top Roofing Contractor:
In this blog post, we will focus specifically on repairing damaged roofing plywood, a common issue that can compromise the overall integrity of your roof. Damaged plywood can occur due to various factors, such as water leaks, pest infestations, or general wear and tear over time. Our step-by-step guide will provide you with the knowledge and instructions necessary to address this problem effectively.
C. A Concise Guide to the Step-by-Step Process of Roof Repair and Replacement by Top Jacksonville Roofing Contractors:
Repairing damaged roofing plywood may seem like a daunting task, but with the right guidance and tools, it can be accomplished successfully. Our step-by-step process will break down the repair procedure into manageable tasks, ensuring that you can tackle the project with confidence.
First, we will guide you through preparing the work area, which involves removing the existing felt underlayment and any metal or plastic caps. We will emphasize the importance of checking the weather forecast to ensure optimal working conditions.
Next, we will explain how to mark the studs using a chalk line, enabling you to locate and identify the necessary areas for repair accurately. The use of existing framing nails as a guide will simplify this step.
The subsequent section will cover cutting the plywood, emphasizing the need for precise measurements and the right saw calibration. We will provide tips on making clean cuts and ensuring the plywood fits securely on the studs.
Removing the damaged plywood is a critical step in the repair process. We will discuss using a claw bar to remove existing framing nails near the top areas and inspecting the studs for any necessary repairs.
Once the damaged plywood is removed, we will guide you on positioning and cutting the new plywood to fit snugly in the work area. This section will also address adjustments needed for pipes or vents, ensuring a proper fit.
Finally, we will explain how to nail down the new plywood, emphasizing the importance of using framing nails and spacing them appropriately. We will also touch upon common roof leak issues and prevention methods, such as using screws with rubber gaskets instead of nails.
By following this step-by-step process, you can repair damaged roofing plywood effectively, ensuring the longevity and stability of your roof.
Efficiently Preparing the Work Area: Expert Roofing Contractor Services in Jacksonville, FL:
A. Removing felt underlayment during roof repair in Jacksonville, FL:
Before beginning the process of repairing damaged roofing plywood, it is crucial to remove the existing felt underlayment. The felt underlayment is a protective layer that lies between the plywood and the shingles, providing an additional barrier against water infiltration.
To remove the felt underlayment, start by locating any metal or plastic caps that may be securing it in place. These caps are typically found along the edges of the roof. By removing these caps first, you can make the process of removing the felt underlayment much easier.
Using a pry bar or a similar tool, gently lift the edges of the felt underlayment and peel it away from the plywood. Take care not to damage the plywood or any surrounding materials during this process. Dispose of the old felt underlayment properly, ensuring a clean and debris-free work area.
B. Expert Tips for Effortlessly Removing Metal or Plastic Caps: Techniques and Advice from Jacksonville Roofing Contractors:
Removing metal or plastic caps can sometimes be a challenging task, but with a few tips, the process can be made easier. Here are some suggestions to help you remove these caps effectively:
- Use the appropriate tools: Depending on the type of caps used, you may need a pry bar, a flathead screwdriver, or a specialized cap removal tool. Ensure that you have the right tools on hand to avoid damaging the caps or the surrounding materials.
- Apply penetrating oil: If the caps are stuck or rusted, applying a penetrating oil can help loosen them. Allow the oil to penetrate for a few minutes before attempting to remove the caps.
- Gentle prying: When removing the caps, use gentle but firm pressure to pry them away from the plywood. Avoid using excessive force, as this can cause damage to the caps or the underlying materials.
- Work systematically: Start from one end of the roof and work your way across, removing each cap one at a time. This systematic approach ensures that you do not miss any caps during the removal process.
C. The Significance of Checking the Weather Forecast Prior to Initiating the Project for Roof Repair in Jacksonville, FL:
Before embarking on any roofing project, including repairing damaged plywood, it is essential to check the weather forecast. Roof repairs should ideally be done during dry and calm weather conditions.
Rain or high winds can make the work area unsafe and hinder the progress of the repair project. Moisture can also compromise the integrity of the plywood and affect the adhesion of any sealants or adhesives used during the repair process.
By checking the weather forecast, you can plan your repair project accordingly, ensuring that you have clear skies and suitable conditions for working on the roof. It is advisable to schedule the repair project during a period of several consecutive dry days to allow ample time for completing the repairs.
Finding the Best Roofing Contractor in Jacksonville for Roof Repair and Stud Marking Services:
A. Efficiently Marking Y Studs: The Role of a Jacksonville Roofing Contractor and the Use of a Chalk Line:
When repairing damaged roofing plywood, it is crucial to locate and mark the Y studs accurately. Y studs are vertical framing members that provide support and stability to the roof structure. To mark the Y studs, follow these steps:
- Start by identifying the existing framing nails on the roof. These nails are typically located near the top areas of the roof and can serve as markers for the Y studs.
- Take a chalk line and stretch it across the roof, aligning it with the existing framing nails. This will create a straight line that represents the Y stud.
- Repeat this process for each Y stud, ensuring that the chalk lines are straight and aligned with the existing nails. This will help you accurately identify the location of the Y studs and guide the repair process.
B. Optimizing Framing Nails for Accurate Stud Location: A Guide for Contractors and Roofers in Jacksonville, Florida:
Locating the studs is an essential step in repairing damaged roofing plywood. By utilizing the existing framing nails, you can easily identify the position of the studs. Here’s how to do it:
- Examine the roof carefully, paying close attention to the areas where the plywood is damaged or needs repair.
- Look for the existing framing nails that are visible on the roof’s surface. These nails are typically used to secure the plywood to the studs.
- Use the position of these framing nails as a guide to locate and mark the Y studs. They serve as reliable indicators of the stud’s position and can help you accurately plan your repair process.
C. Improving Accuracy: Utilizing X Lines for Precise Measurements on Upper and Lower Surfaces:
To ensure precise measurements and a proper fit for the new plywood, it is essential to mark X lines on the top and bottom edges. This will guide the cutting process and ensure accurate placement of the new plywood. Follow these steps:
- Identify a squared edge on the roof, such as a plywood join or the top or bottom roof edge. This squared edge will serve as a reference point for marking the X lines.
- Measure and mark the X lines on both the top and bottom edges of the damaged plywood, ensuring they are at a perfect 90-degree angle to the squared edge.
- Use a chalk line to connect the marked points on the top and bottom edges, creating straight and precise X lines. These lines will guide the cutting process and help maintain the structural integrity of the roof.
By using a chalk line to mark Y studs, utilizing existing framing nails to locate studs, and marking X lines on the top and bottom edges, you can ensure precise measurements and accurate placement of the new plywood during the repair process.
Expert Roofing Contractor in Jacksonville: Cutting the Plywood for Roof Repair Services:
A. Achieving Accurate Cuts on Marked Lines with the Assistance of a Skilled Roofer and Quality Roofing Service in Jacksonville, Florida:
Once you have marked the X lines on the damaged plywood, it’s time to make the necessary cuts. Using a saw, carefully follow the marked lines to remove the damaged section of plywood. Here’s how to do it:
- Position the saw blade along one of the marked lines, ensuring that it aligns perfectly with the line.
- Start the saw and make a steady, controlled cut along the marked line. Take your time and maintain a firm grip on the saw to ensure accuracy.
- Continue cutting along all four sides of the marked lines until the damaged section of plywood is completely removed. Be cautious not to cut into the underlying studs or surrounding materials.
B. Maintaining Stability: Ensuring a Centered Cut on the Stud with Expert Roofing Services:
When making the cuts, it is crucial to ensure that they are centered on the stud. This ensures stability and provides a firm foundation for the new plywood. Follow these steps for a centered cut:
- Before making the cut, visually inspect the marked lines and align them with the center of the stud. This will help you determine the correct position for the saw blade.
- Take your time and make precise cuts, ensuring that the blade remains centered along the marked line. Avoid veering too much to the right or left, as this can compromise the stability of the plywood.
- By keeping the cut centered on the stud, you create a solid and secure base for the new plywood to rest on. This promotes structural integrity and prevents future issues.
C. Optimizing Saw Calibration to Safeguard Studs and Prevent Damage during Roofing Projects:
To prevent damage to the underlying studs, it is essential to calibrate the saw to the right depth. This ensures that the blade cuts through the plywood without cutting into the studs. Here’s how to calibrate the saw:
- Measure the thickness of the plywood using a tape measure or ruler. This measurement will help you determine the appropriate depth for the saw blade.
- Adjust the depth of the saw blade according to the thickness of the plywood. Most saws have a depth adjustment feature that allows you to set the blade at the desired depth.
- Double-check the depth setting before making the cuts to ensure that the blade will only cut through the plywood and not into the studs. This prevents unnecessary damage and maintains the structural integrity of the roof.
By using a saw to make cuts along the marked lines, ensuring the cut is centered on the stud, and calibrating the saw to the right depth, you can effectively remove the damaged plywood without compromising the stability of the roof’s structure.
Expert Roofing Contractors in Jacksonville for Efficient Plywood Removal and Repair Services:
A. Efficiently Removing Top Area Framing Nails with a Claw Bar: A Guide for Jacksonville Roofers:
After cutting the damaged plywood, the next step is to remove any existing framing nails near the top areas. This allows for easier removal of the damaged plywood and prepares the area for the installation of the new plywood. Here’s how to do it:
- Position a claw bar or a similar tool under the head of each framing nail near the top areas of the plywood.
- Apply gentle pressure and use the claw bar to pry the nails out of the studs. Take care not to damage the studs or surrounding materials during this process.
- By removing the framing nails, you ensure that the damaged plywood can be easily lifted away without any obstructions. This makes the removal process smoother and prepares the area for the next steps of the repair.
B. Examining Roofing Studs for Strength and Stability: A Focus on Jacksonville Roofing Services:
Once the damaged plywood is removed, it is essential to inspect the studs for strength and stability. Studs provide the structural support for the roof, and any issues with them can compromise the overall integrity of the roof. Follow these steps to inspect the studs:
- Visually examine the studs for any signs of damage, such as rot, cracks, or insect infestation. Pay close attention to areas where the plywood was removed.
- Use a flashlight to check for any signs of moisture or water damage on the studs. Moisture can weaken the wood, leading to further issues down the line.
- Tap the studs lightly with a hammer, listening for any hollow or weak sounds. Strong and solid studs will produce a firm and solid sound.
C. Stud Cleaning: Removing Lifted Nails and Wood Chips for Jacksonville Roofers:
To ensure a smooth and secure installation of the new plywood, it is crucial to clean the studs from any lifted nails or wood chips. This creates a clean and flat surface for the new plywood to rest on. Follow these steps to clean the studs:
- Remove any lifted nails using a hammer or pliers. Take care not to damage the studs during this process.
- Use a brush or a broom to sweep away any wood chips or debris from the studs. This ensures a clean and even surface for the new plywood.
- By cleaning the studs, you create a solid foundation for the new plywood, promoting stability and longevity. It also helps prevent any potential issues that may arise from uneven surfaces or obstructions.
By using a claw bar to remove existing framing nails near the top areas, inspecting the studs for strength and stability, and cleaning the studs from any lifted nails or wood chips, you can ensure a clean and secure base for the installation of the new plywood.
Expert Roofing Contractor in Jacksonville: Precision and Technique for Positioning and Cutting the New Plywood:
A. The strategic placement of the recently acquired plywood within the designated workspace: A comprehensive guide for roofers, roofing services, and commercial roofing in Jacksonville, Florida:
Once the damaged plywood and studs have been inspected and cleaned, it’s time to position the new plywood in the work area. Proper positioning is crucial for a successful repair. Follow these steps:
- Carefully lift the new plywood and position it in the area where the damaged plywood was removed. Ensure that it aligns with the surrounding plywood and studs.
- Take into consideration any existing seams or joints in the plywood and try to align them with the neighboring pieces for a seamless and uniform appearance.
- By positioning the new plywood correctly, you create a solid and even surface for the rest of the repair process. This promotes stability and ensures the longevity of the roof.
B. Ensuring Adequate Modifications for Pipes or Vents: A Comprehensive Approach to Roofer Services, Jacksonville Roofing, Roofing in Jacksonville, FL Roofing Contractor, Roof Replacement, and More:
In some cases, there may be pipes or vents that pass through the roof in the area where the new plywood will be installed. It is essential to make necessary adjustments to accommodate these obstructions. Follow these steps:
- Carefully measure the dimensions of the pipes or vents that need to be accommodated. Take precise measurements to ensure a proper fit.
- Mark the measurements on the new plywood, indicating the areas that need to be cut or adjusted.
- Use a saw or appropriate cutting tool to make the necessary adjustments on the new plywood. Take caution to cut accurately and safely, avoiding any damage to the surrounding materials.
- By making the necessary adjustments for pipes or vents, you ensure that the new plywood fits snugly around these obstructions, maintaining the integrity of the roof and preventing any potential leaks or issues.
C. Enhancing the Installation of a Snug-Fitting Roof in Jacksonville by Incorporating a Subtle Overhang at the Perimeters:
To ensure a secure installation and proper functioning of the new plywood, it is important to ensure a snug fit with a small gap around the edges. Follow these steps:
- Position the new plywood in the work area, allowing for a small gap of approximately 1 inch around all four edges.
- The small gap provides room for expansion and contraction of the plywood due to temperature and moisture changes, preventing warping or buckling.
- By ensuring a snug fit with a small gap, you create a stable and durable roofing system that can withstand various environmental conditions.
By positioning the new plywood in the work area, making necessary adjustments for pipes or vents, and ensuring a snug fit with a small gap around the edges, you can ensure a proper and secure installation of the new plywood during the repair process.
Nailing Down the Plywood: Unveiling the Top Roofing Contractors in Jacksonville for the Best Roofing Services:
A. Securing Plywood to Studs on Jacksonville Roofs: A Guide to Using Framing Nails:
Once the new plywood is properly positioned in the work area, the next step is to secure it to the studs using framing nails. Framing nails provide strength and stability to the plywood, ensuring a secure installation. Follow these steps:
- Position the framing nails along the edges of the new plywood, ensuring they penetrate through the plywood and into the underlying studs.
- Use a hammer or nail gun to drive the framing nails into the plywood and studs, taking care not to damage the surrounding materials.
- Space the nails evenly along the edges, ensuring sufficient coverage to hold the plywood securely in place.
B. Ensuring Stability: Recommended Nail Spacing for Roofing Companies and Residential Roof Repair or Replacement:
Proper spacing of the nails is crucial to ensure the stability and longevity of the new plywood. Follow these recommendations for nail spacing:
- Space the nails approximately 6 to 8 inches apart along the edges of the plywood. This spacing provides sufficient holding power and prevents the plywood from lifting or shifting.
- Pay special attention to the corners and edges, ensuring that they are adequately secured with nails to prevent any potential gaps or movement.
C. Securing Proper Nailing of New and Existing Plywood for Roof Stability: A Guide to FL Roofing Companies and Residential Roof Repair:
During the repair process, it is important to ensure that both the new and existing plywood are properly nailed down. This ensures a uniform and secure roofing system. Follow these steps to nail down both types of plywood:
- Inspect the existing plywood for any loose nails or areas that may need reinforcement. Drive additional nails into any loose areas to secure the existing plywood to the studs.
- Pay close attention to the areas where the new and existing plywood meet, ensuring that they are properly aligned and secured together.
- Drive framing nails through the overlapping sections of the new and existing plywood, creating a seamless connection and promoting stability.
By properly nailing down both the new and existing plywood, you create a unified and strong roof structure that can withstand various weather conditions.
By using framing nails to secure the plywood to the studs, following the recommended spacing for the nails, and ensuring both the new and existing plywood are properly nailed down, you can achieve a secure and stable installation of the repaired roof.
Preventing Common Roof Leak Issues: Expert Tips from Jacksonville’s Best Roofing Contractors:
A. Common Roof Leak Issues with Exposed Flashing: A Comprehensive Explanation for Jacksonville Residents and Homeowners:
One of the common causes of roof leaks is related to exposed flashing. Flashing is a material, often made of metal, that is used to seal joints and transitions on the roof, such as where the roof meets a chimney, skylight, or vent pipe. Over time, the flashing can deteriorate or become damaged, leading to water infiltration and roof leaks.
Exposed flashing can occur when the sealant used to secure the flashing deteriorates or breaks down. This can happen due to age, weather exposure, or poor installation. When the sealant fails, water can seep into the gaps between the flashing and the roof, causing leaks and potential damage to the underlying structure.
To prevent roof leaks around exposed flashing, it is important to regularly inspect and maintain the flashing. Look for signs of deterioration, such as cracks, gaps, or missing sections. If any issues are identified, it is recommended to consult a professional roofing contractor, such as Florida Roofing Pros, a reputable residential roofing repair company in Jacksonville, to properly repair or replace the flashing and prevent further leaks.
B. The Advantages of Using Screws with Rubber Gaskets for Roof Repairs in the FL Roofing Industry:
When it comes to securing roofing materials, such as plywood, it is essential to choose the right fasteners. While nails have traditionally been used, they can be prone to backing out over time, especially in areas with high wind or extreme weather conditions. This can create gaps and compromise the integrity of the roof, leading to potential leaks.
To ensure a longer-lasting and more secure roof, it is recommended to use screws with rubber gaskets instead of nails. These screws provide a tighter and more secure connection between the roofing materials and the underlying structure. The rubber gaskets create a watertight seal, preventing water from seeping through the fastener holes and causing leaks.
By using screws with rubber gaskets, you can significantly reduce the risk of leaks and enhance the overall durability of your roof. This method is especially important for areas with exposed flashing, as it helps maintain a proper seal and prevents water infiltration.
C. The advantages of screws for a more durable roof in Jacksonville, Florida: Insights from roofing companies and experts in residential roofing and repairs:
Using screws instead of nails for securing roofing materials offers several benefits that contribute to a longer-lasting roof:
- Enhanced stability: Screws provide a stronger and more secure connection between the roofing materials and the underlying structure. This helps prevent shifting or movement of the materials, ensuring the roof remains intact during extreme weather events.
- Better resistance to backing out: Unlike nails, screws are less likely to back out over time. This helps maintain the integrity of the roof and reduces the risk of gaps or loose materials that can lead to leaks.
- Watertight seal: The rubber gaskets on screws create a watertight seal, preventing water from seeping through the fastener holes. This significantly reduces the risk of leaks and water damage to the roof and underlying structure.
By choosing screws with rubber gaskets over nails, you can enjoy a longer-lasting roof that is more resistant to leaks and provides enhanced protection for your home.
A. Recap of the step-by-step process for repairing damaged roofing plywood:
Repairing damaged roofing plywood is a crucial step in maintaining a healthy and sturdy roof. Let’s recap the step-by-step process we covered in this blog:
- Prepare the work area by removing the existing felt underlayment and any metal or plastic caps.
- Mark the Y studs using a chalk line and utilize existing framing nails to locate the studs. Mark X lines on the top and bottom edges for precise measurements.
- Use a saw to make cuts along the marked lines, ensuring the cut is centered on the stud for stability. Calibrate the saw to the right depth to avoid damaging the studs.
- Use a claw bar to remove existing framing nails near the top areas. Inspect the studs for strength and stability, and clean them from any lifted nails or wood chips.
- Position the new plywood in the work area, making necessary adjustments for pipes or vents. Ensure a snug fit with a small gap around the edges.
- Use framing nails to secure the plywood to the studs, following the recommended spacing for stability. Ensure both the new and existing plywood are properly nailed down.
By following these steps, you can successfully repair damaged roofing plywood, ensuring a strong and reliable roof structure that withstands the test of time.
B. Reiterating the importance of maintaining a healthy and sturdy roof:
To ensure the longevity and reliability of your home, it is vital to maintain a strong and secure roof. The roof serves as a shield against the elements, safeguarding your family from water leaks and providing a comfortable living environment. By regularly inspecting your roof and promptly addressing any concerns, you can avoid costly repairs and preserve the value of your property.
Keep in mind that your roof is constantly exposed to various environmental elements, including heavy rain, strong winds, and intense sunlight. As time goes by, it is inevitable for wear and tear to occur, potentially leading to damaged roofing plywood and the risk of leaks. Therefore, it is crucial to promptly address these issues to prevent further damage and maintain a sturdy roof.
In Jacksonville, Northeast Florida, there are several trusted roofing companies that specialize in both residential and commercial roofing. These companies offer a wide range of services, including roof repair, roof replacement, and installation and repair of asphalt shingle roofing. Homeowners in Jacksonville can rely on these top roofing companies to provide high-quality roofing products and services.
For any roofing needs in Jacksonville, it is recommended to reach out to the best roofing companies in the area. These roofing contractors near you have the expertise and experience to handle all types of roof repairs and replacements. Whether you need a flat roof repair or a complete roof replacement, the best roofers in Jacksonville can cater to your specific requirements.
Don’t neglect the importance of gutter maintenance alongside roofing. Properly functioning gutters are essential for directing water away from your home, preventing water damage and foundation issues. Many roofing companies in Jacksonville also offer gutter installation and repair services, ensuring that your entire roofing and gutter system is in top condition.
In conclusion, maintaining a healthy roof is crucial for the overall well-being of your home. Jacksonville homeowners can rely on the expertise of trusted roofing companies in the area to provide top-notch roof replacement services, installation and repair, and a wide range of roofing products. By addressing any roofing issues promptly and regularly inspecting your roof, you can avoid costly repairs and ensure the longevity of your property.
When embarking on your next roofing project, it is crucial to choose a reputable roofing company that specializes in high-quality roof replacement and repair. In the Florida and Jacksonville area, there are several top-rated roofing companies to consider. One such company is Florida Roofing Solutions, a certified roofing contractor based in Jacksonville with years of experience in roofing and construction.
Florida Roofing Solutions offers a wide range of residential and commercial roofing services. Whether you need a detailed roof inspection, a complete roof replacement, or just some minor repairs, their skilled roofing team can provide the necessary solutions. With their expertise and top-notch roofing materials, you can be confident in the longevity and durability of your roof.
When it comes to the cost of replacing your roof, Florida Roofing Solutions understands the importance of providing competitive pricing without compromising on quality. They strive to offer affordable roofing solutions that meet your budgetary needs. By choosing the best roofing company in the greater Jacksonville area, you can ensure that your roof replacement project is handled with professionalism and excellence.
To maintain a healthy and sturdy roof, Florida Roofing Solutions recommends incorporating preventive measures. For instance, they suggest using screws with rubber gaskets instead of nails to enhance the longevity of your roof. Additionally, they emphasize the significance of regular inspections, maintenance, and timely repairs to keep your roof in optimal condition.
Florida Roofing Solutions is the go-to company for all your roofing needs in Jacksonville and the surrounding areas. With their reputable services and extensive roofing experience, they can provide excellent roofing solutions for both residential and commercial properties. Trust their certified roofing contractors to install a new roof or handle any roofing problems you may encounter. Contact Florida Roofing Solutions today and ensure the longevity and durability of your roof.